Friday, January 14, 2011
Wardrobe revamp
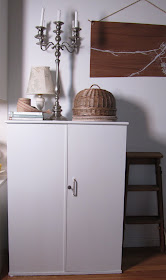
This wardrobe was bought for $10 at an auction for a photo shoot. Having done its duty it ended up at my house as I had grand plans of putting shelves in and then painting as it would make fantastic storage.
It sat around for a while as I wasn't sure what the best way to put shelves in was. Enter extremely handy father-in-law visiting at Christmas. He took note of the internal dimensions and then popped into Bunnings to have two big shelves cut to the exact size. He also picked up some more wood measured to the depth of the cupboards and then came home and sawed what would be four batons that would hold the shelves up (Bunnings wouldn't cut the wood that small).
He then put PVA glue on the back of the batons and screwed them into the sides of the internal space. The shelves rest on top.
Painted the inside of the wardrobe white and the outside in Resene Westar.
I now have a lovely craft cupboard and an invaluable DIY lesson that I'll put to use on a similar small wardrobe I have.
Here's what it looked like before:
Tip: Once the batons have been cut, hold them in place and make sure the screws you're going to use are long enough to go through the baton and into the wardrobe wall without breaking through to the outside.


No comments:
Post a Comment